How to use the Authorization Code Flow in Mobile Apps


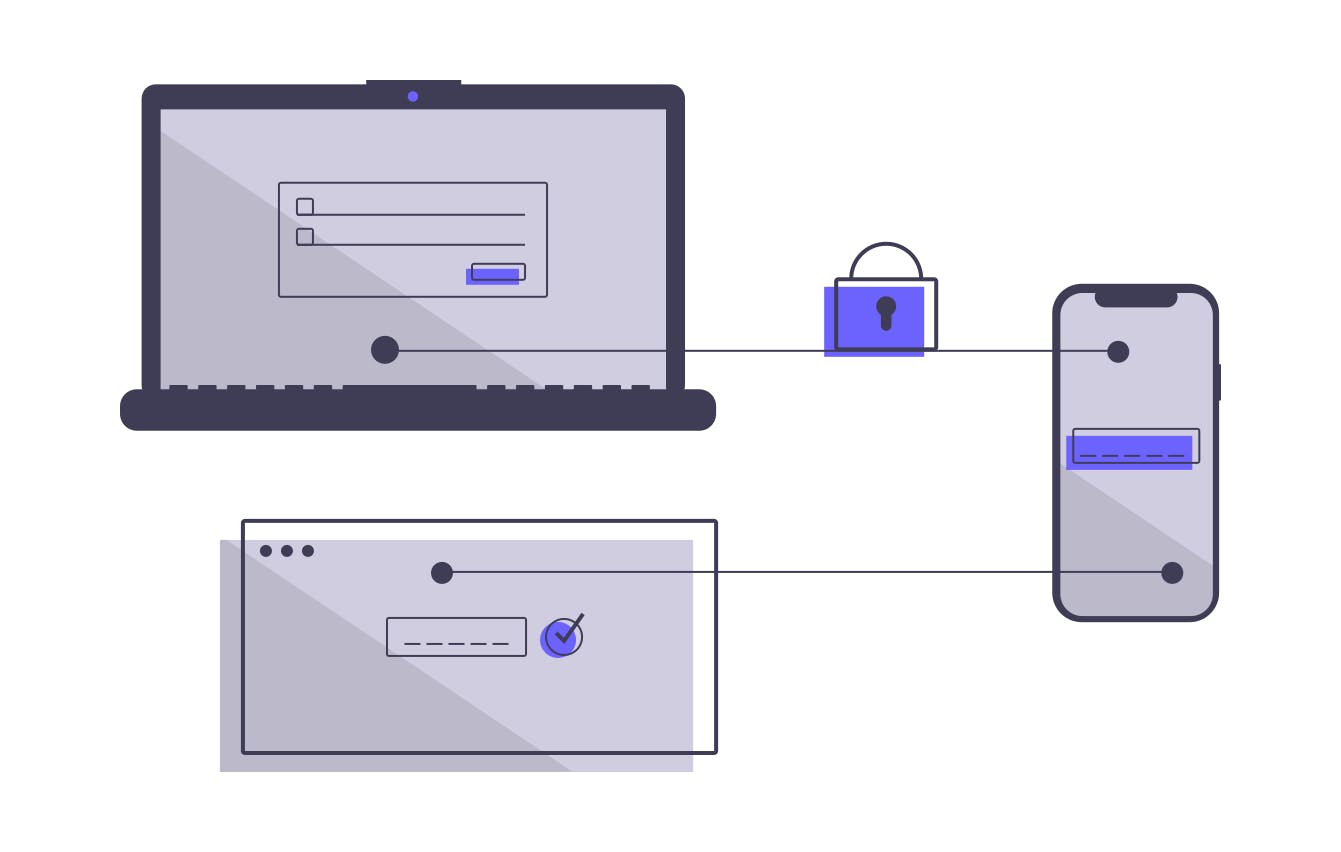
As a developer, we all need strong user authentication systems to implement in our applications to authenticate and authorize users properly. Now the question is "How to do so?". Here OpenID Connect comes into the picture with one solution to the previous question.
Now the question coming to mind is obviously,
What is OpenID?
OpenID is an open standard and decentralized authentication protocol , used for authentication and allows you to use an existing account to sign in to multiple websites, without needing to create new passwords.
Now let's see the solution OpenID is providing:-
Authorization Code Flow
The Authorization Code Flow (defined in OAuth 2.0 RFC 6749, section 4.1) is a part of the OpenID Protocol which exchanges an Authorization Code for a token.
Let's understand everything with a simple flutter application implementation. Here I will not provide all the source code but will give a brief overview so that you can also implement it in your development environment.
So Hey developers, Let's Get Started...🏃🏃🏃
Let's Begin
Step 1
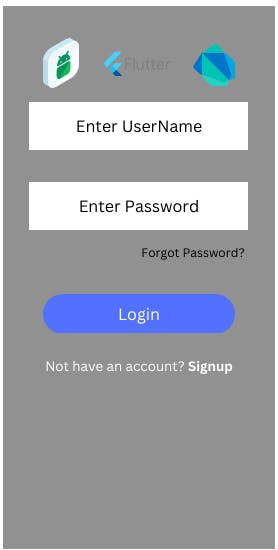
First of all, we should have a web app URL which should load an authentication page like this:
Now let's see the format of the probable dummy URL,
https://api.thedirone.com/app-accounts/auth/authorize?clientId= asdjhsbdjhaaDbjajKJndj&scope=openid&redirectUri=https://app.thedirone.com/redirect&responseType=code&state=anshyeusjhrted&countryCode=91
P.S : Its a Dummy URL and the user should be signed up before
Now let's understand the URL's query parameters,
clientId \=> The "clientId" (representing Client Identifier) should be a unique registered ID verified by the backend or Authorization Server (The server responsible for authenticating users). Each "clientId" should be unique. For mobile applications, we can make some platform specific (e.g, android, ios etc) client identifiers and register them to our authorization server in our backend.
scope => It is defining the scope of the access request using the "scope" request parameter. In turn, the authorization server or the backend uses the "scope" response parameter to inform the client (The client with specific "clientId") of the scope of the access token issued. Here according to the OpenID standard, we are passing the value "openid".
redirectUri => There should be a URI registered by the authorization server which should be passed to the parameter and the authorization server will redirect to the same URI as an authorization response.
responseType => Mention the type of response you need from the authorization server. The value must be set to "code" according to the OpenID standard.
state => An opaque value used by the client to maintain the state between the request and callback. The authorization server includes this value when redirecting back to the client. From our app, we can use a random string as a state and should pass it to the parameter. Here we are sending for example "anshyeusjhrted"
countryCode => Put your country code into the parameter. (eg. for India it is 91).
Now to render this page inside our app we need to use a WebView. Here is the code sample,
class WebPage extends StatefulWidget {
  @override
  State<WebPage> createState() => _WebPageState();
}

class _WebPageState extends State<WebPage> {
  bool isVerified = false;
  WebViewController controller = WebViewController()
    ..setJavaScriptMode(JavaScriptMode.unrestricted)
    ..setBackgroundColor(const Color(0x00000000))
    ..setNavigationDelegate(
      NavigationDelegate(
        onProgress: (int progress) {
          // Update loading bar.
        },
        onPageStarted: (String url) {
          // Do something at page rendering started
        },
        onPageFinished: (String url) {
          if (url.contains("auth_code")) {
            // Do something at page rendering finished
          }
        },
        onWebResourceError: (WebResourceError error) {},
        onNavigationRequest: (NavigationRequest request) {
          if (request.url.startsWith('https://www.youtube.com/')) {
            return NavigationDecision.prevent;
          }
          return NavigationDecision.navigate;
        },
      ),
    )
    ..loadRequest(Uri.parse('https://api.thedirone.com/app-accounts/auth/authorize?clientId= asdjhsbdjhaaDbjajKJndj&scope=openid&redirectUri=https://api.thedirone.com/redirect&responseType=code&state=anshyeusjhrted&countryCode=91'));

  @override
  Widget build(BuildContext context) {
    return Scaffold(
      appBar: AppBar(title: const Text('Flutter Simple Example')),
      body: WebViewWidget(controller: controller),
    );
  }
}
Now, after giving all the credentials and clicking on the login button the authorization server should redirect the client (here our app's webview) to the redirect URI with some necessary parameters' values. Let's see the whole URL,
https://app.thedirone.com/redirect?auth_code=dvbkuqflmjfghrwdkmqzkrniqpnszxxdbswicgyxhxohozgndfhptinihzhnmnouuzqyxdztjpunzkkeavyjxkwzicikuhlgbidrdaplkyoohzmyacyomifpvbuqzber&state=anshyeusjhrted&tokenSecret=ysothxjxvedwzwzrtulcsakqdbtvvkaxsskswqpbfczgsizzcwsswgcdiufvohclqdhfwjbjtyweoqedagqeyobiocyimztjanjenucgzuljlptqyncplomvouqadkkp
Now let's understand the dummy URL's query parameters,
auth_code => The authorization code generated by the authorization server. The authorization code MUST expire shortly after it is issued to mitigate the risk of leaks.
state =>The state (anshyeusjhrted) should be as same as the login page URL which we have sent to the authorization server.
tokenSecret => An additional secret code is sent by the authorization server to make a post request to fetch the Access and Refresh token.
Now, Inside our app, we will have to get the above URL from the webview after the page is rendered. Then we need to separate the authcode , state and tokenSecret from the URL string and need to store them separately. To do so,
class MyAppUtils {
  static AuthBody getAuthBodyFromUrl(String url){
    var uri = Uri.parse(url);
    var query = uri.queryParameters;
    var authBody = AuthBody();
    authBody.authCode = query["auth_code"];
    authBody.tokenSecret = query["tokenSecret"];

    return authBody;
  }
}

class AuthBody {
  String? authCode;
  String? tokenSecret;
  String? clientSecret = "sdnisdkjduaakudueniiszJia";
  String? state = "anshyeusjhrted";
  String? redirectUri = "https://app.thedirone.com/redirect";
}
In the above code, we are getting the auth_code and tokenSecret from the URL.
And to get the URL, do the following inside onPageFinished() callback of the webview,
onPageFinished: (String url) {
// Here checking if the redirect URL contains the "auth_code" or not.
          if (url.contains("auth_code")) {
         // Getting the AuthBody from the url
            AuthBody authBody = MyAppUtils.getAuthBodyFromUrl(url);
          }
        },
Now, we need to make a POST request to an API which will give the access and refresh token as a response.
for our case the dummy API's uri could be like this,
https://appapi.thedirone.com/yoga-accounts/auth/openIdLogin/token
Here is how to make the POST request in Flutter,
Future<http.Response> createPostReq(AuthBody body) async {
  String url = "https://appapi.thedirone.com/yoga-accounts/auth/openIdLogin/token";
  var response = await http.post(
    Uri.parse(url),
    headers: <String, String>{
      'Content-Type': 'application/x-www-form-urlencoded; charset=UTF-8',
      'x-access-token': body.tokenSecret!
    },
    body: {
      "auth_code": body.authCode,
      "client_secrete": body.clientSecret,
      "state": body.state,
      "redirectUri": body.redirectUri
    },
  );

  if (response.statusCode == 200) {
    // If the server did return a 200 OK response,
    // then parse the JSON.
    return response;
  } else {
    // If the server did not return a 200 OK response,
    // then throw an exception.
    throw Exception('Failed to load');
  }
}
At the time of making POST request we need to put the application/x-www-form-urlencoded as Content-Type and the tokenSecret as x-access-token into the header and the auth_code, clientSecret, state and redirectUri into the body of the request. Then as the response we will get a access_token and refresh_token
Upto there we can say a user is being successfully authenticated. Later with the help of the access_token and success_token we can hit other APIs securely.
Hopefully, you have enjoyed it till now. Thank you for reading it.